Avoid opening a skin as a world file
A skin PNG belongs in character settings. A building schematic needs a structure tool, so double-clicking or renaming the file will not place it in a world.
Match your download to your Minecraft edition. Follow the skin PNG or structure-file workflow, then check the result before using it in your main world.
Use the downloaded 64×64 PNG, not a screenshot of the character. Note whether the skin uses classic or slim arms.
Download the PNG to your device. Keep the original file format; do not turn it into a screenshot or JPG.
For Java, open Minecraft: Java Edition in the launcher and use the Skins tab to add your PNG. On supported Bedrock devices, use the Dressing Room’s custom skin import controls.
Select classic or slim to match the exported skin. Inspect the character after applying it.
Use a compatible WorldEdit installation in Java Edition for .schem files. For .litematic, legacy .schematic or Bedrock .mcstructure, follow the format-specific sections below.
Back up your world first. Use a separate test area so you can check the size and placement without affecting an existing build.
Put the .schem file in your WorldEdit installation’s schematics folder. Use //schem list to find it, then //schem load filename.schem with your actual filename. You need permission to run these commands.
Stand in a clear test area and use //paste. Placement depends on the stored origin. Check the result; use //undo immediately if you need to remove the paste and try a different position.
The exported files have passed format checks. Minecraft-client import testing is still pending; test compatibility, materials and movement in your own game version.
A skin PNG changes your character. Building downloads contain block structures in .schem, .litematic, .schematic or .mcstructure format. Each needs a matching import tool; none of these is a complete world download.
A skin PNG belongs in character settings. A building schematic needs a structure tool, so double-clicking or renaming the file will not place it in a world.
WorldEdit and Litematica are Java workflows. Bedrock .mcstructure imports need a compatible platform or structure-loading setup.
Paste a structure in a backed-up or test world first so you can check its size, origin, blocks and entrances before using your main save.
Apply a compatible skin using your game’s skin settings.
Return to the editor if a texture detail needs work.
Check house rooms, castle entrances and stairways in a test world. For sculptures, inspect the block shape and materials. Add furniture and other finishing touches yourself.
Use these real sample files to practice the matching import workflow. Start in a spare world, inspect the result, then use your own downloads.

Download the PNG and choose the matching model in Minecraft skin settings. A preview screenshot will not work as the texture.
Download skin PNG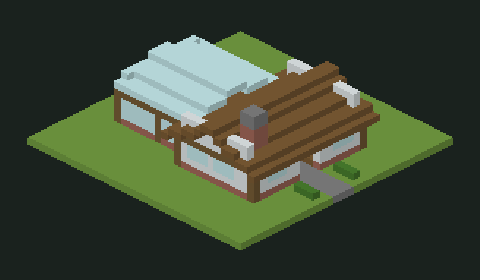
Load this actual block structure with a compatible WorldEdit installation. Check the origin, door and interior in a test world.
Download .schem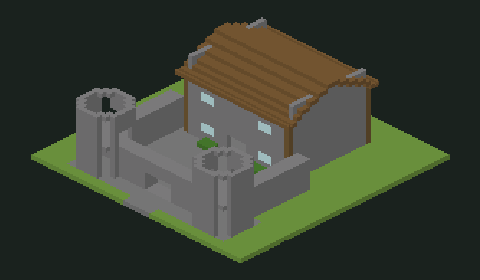
Load this actual castle file with a compatible Litematica version and use its placement guide while you build.
Download .litematicOpen a skin PNG in your game’s skin controls. Use .schem with WorldEdit, .litematic with Litematica, and legacy .schematic only with a compatible importer. Use .mcstructure with a supported Bedrock workflow.
These files belong in different tools. Renaming .schem to .mcworld does not turn a structure into a world, and renaming a PNG does not make it a building.
If the arms look misplaced, match the game’s body model to the skin: classic uses four-pixel-wide arms, slim uses three. Check the model before repainting the texture.
If the image is rejected, use the original 64×64 PNG download. A JPEG, screenshot of the preview or resized picture is not a replacement for the skin texture.
Install a Litematica version compatible with your Minecraft version and its required dependencies. Place the .litematic file in its schematics directory, load it through the mod menu and create a placement in your test world.
Use the placement as a visual guide when building by hand. Loading a schematic does not automatically place every block or supply Survival materials. Controls and available placement tools depend on your mod version.
In Minecraft for Windows (Bedrock), use a Creative world you host. Place a structure block, switch it to Load mode and use Import to select the .mcstructure file. Check the preview and offsets, then select Load.
The Import button is not available on every platform. Other setups may require a compatible behavior pack or external import workflow. This site exports the structure file, not a ready-made behavior pack or .mcworld.
Test before adding a build to a world you want to keep, after changing game versions, or when switching import tools. Make a backup and leave enough empty space to inspect placement.
For houses and castles, check doors, stair headroom and room connections in game. The generator’s access checks cover planned locations; they do not simulate every player movement or guarantee every interior space.
Confirm that your importer supports the file format and block versions. If a legacy .schematic loses newer materials, try .schem with a compatible modern WorldEdit setup instead.
The block preview uses approximate textures; resource packs and in-game lighting can change the appearance. A sculpture’s smooth source model is a separate reference, while the voxel preview shows its block conversion.
Use the skin steps if you have a generated or edited PNG ready to equip. Use the structure sections if you want to place a house, castle or statue in an existing world.
For a manual Survival build, use browser layers and material counts or a compatible Litematica guide. You still collect materials and place the blocks yourself.
A review should name the Minecraft edition, importer and file used, so another player can understand the result.
No verified import review is available yet. Use the sample PNG and structure files above in a test world.
What you can verify now
Use the ranger sample in the game’s skin controls and match the correct arm model.
Open the cottage .schem with a compatible WorldEdit installation in a spare world before pasting it into a main save.
Load the castle .litematic in a compatible Litematica setup. A placement guide does not place Survival materials for you.
Record any import differences to fix
Note missing materials, misplaced blocks or skin details to revisit. Download the note so you can compare it with the original file.
Select the same classic or slim model that was used to create the PNG. A mismatch can make arm textures look misplaced.
Custom PNG support depends on the Bedrock platform. Some console editions restrict these imports; downloading a standard skin file does not remove that restriction.
A schematic is structure data. Load it in a compatible tool such as WorldEdit; it is not a standalone Minecraft world or installer.
Check the schematics folder used by your actual client or server installation, then use //schem list and load the matching filename. Also check command permissions and format support.
Loading it creates a schematic reference or placement in Litematica. A Survival guide still requires materials and manual building; other paste features depend on your setup and permissions.
Microsoft documents the file Import button for the Windows version of Bedrock. On other platforms, you need another supported workflow, such as a compatible behavior pack. A .mcstructure file does not become a .mcworld by renaming it.
Use an importer that supports that format. Legacy block mappings can lose newer materials; select .schem and a compatible modern WorldEdit setup when possible.
The voxel preview uses approximate textures. Resource packs, lighting and version compatibility can change the in-game result. A smooth source model for a statue is not the final block structure.
No. The generator checks paths to locations named in its plan. Inspect the imported rooms, doors and stairs in your Minecraft version before relying on the layout.
